

You Will Need:
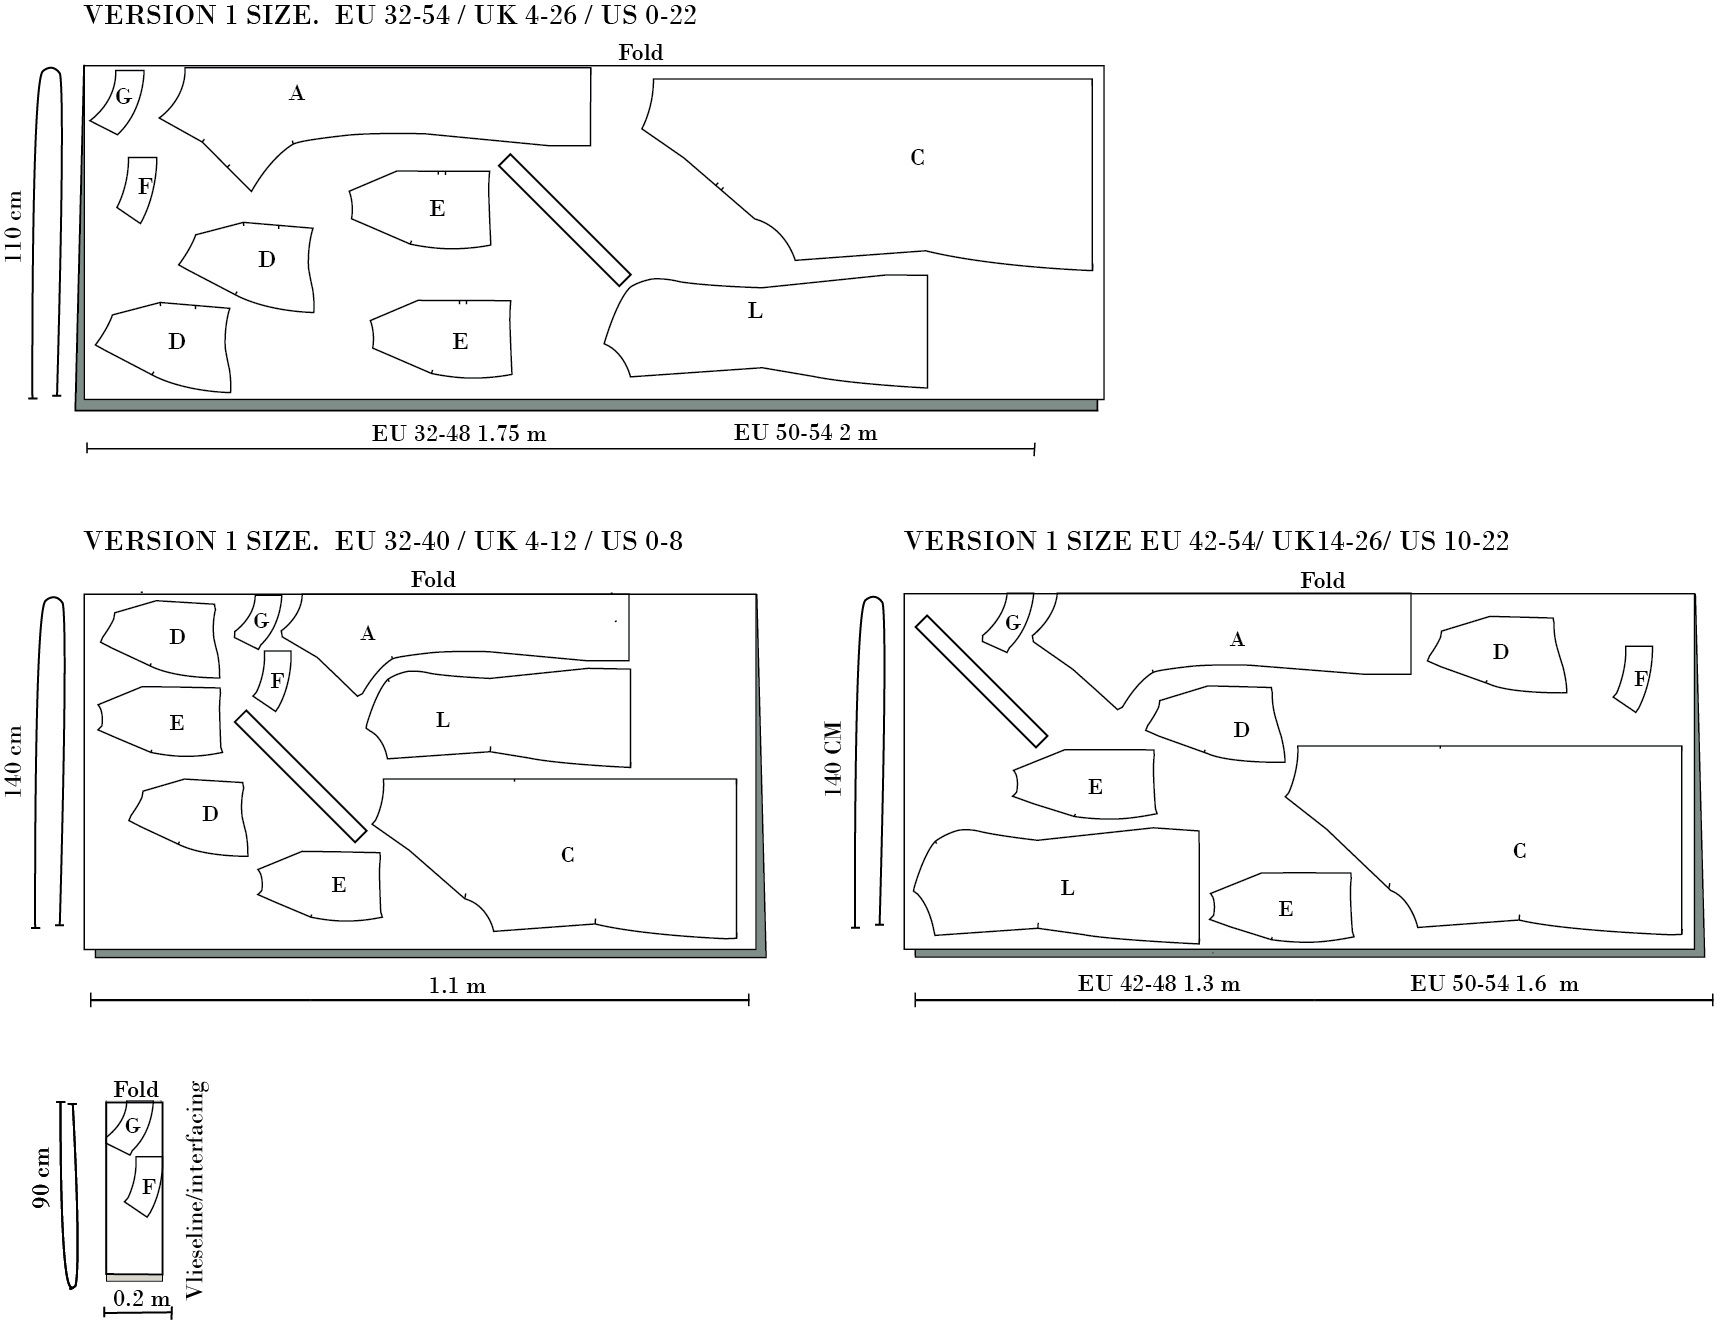
Fabric width 110 cm.
EU 32-48 1.75 m
EU 50-54 2 m
Fabric width 140 cm.
EU 32-40 1.1 m
EU 42-48 1.3 m
EU 50-54 1.6 m
Thread.
1 button.
Interfacing 20 cm.
(Cut bias tape from your fabric - see cutting layout plan)
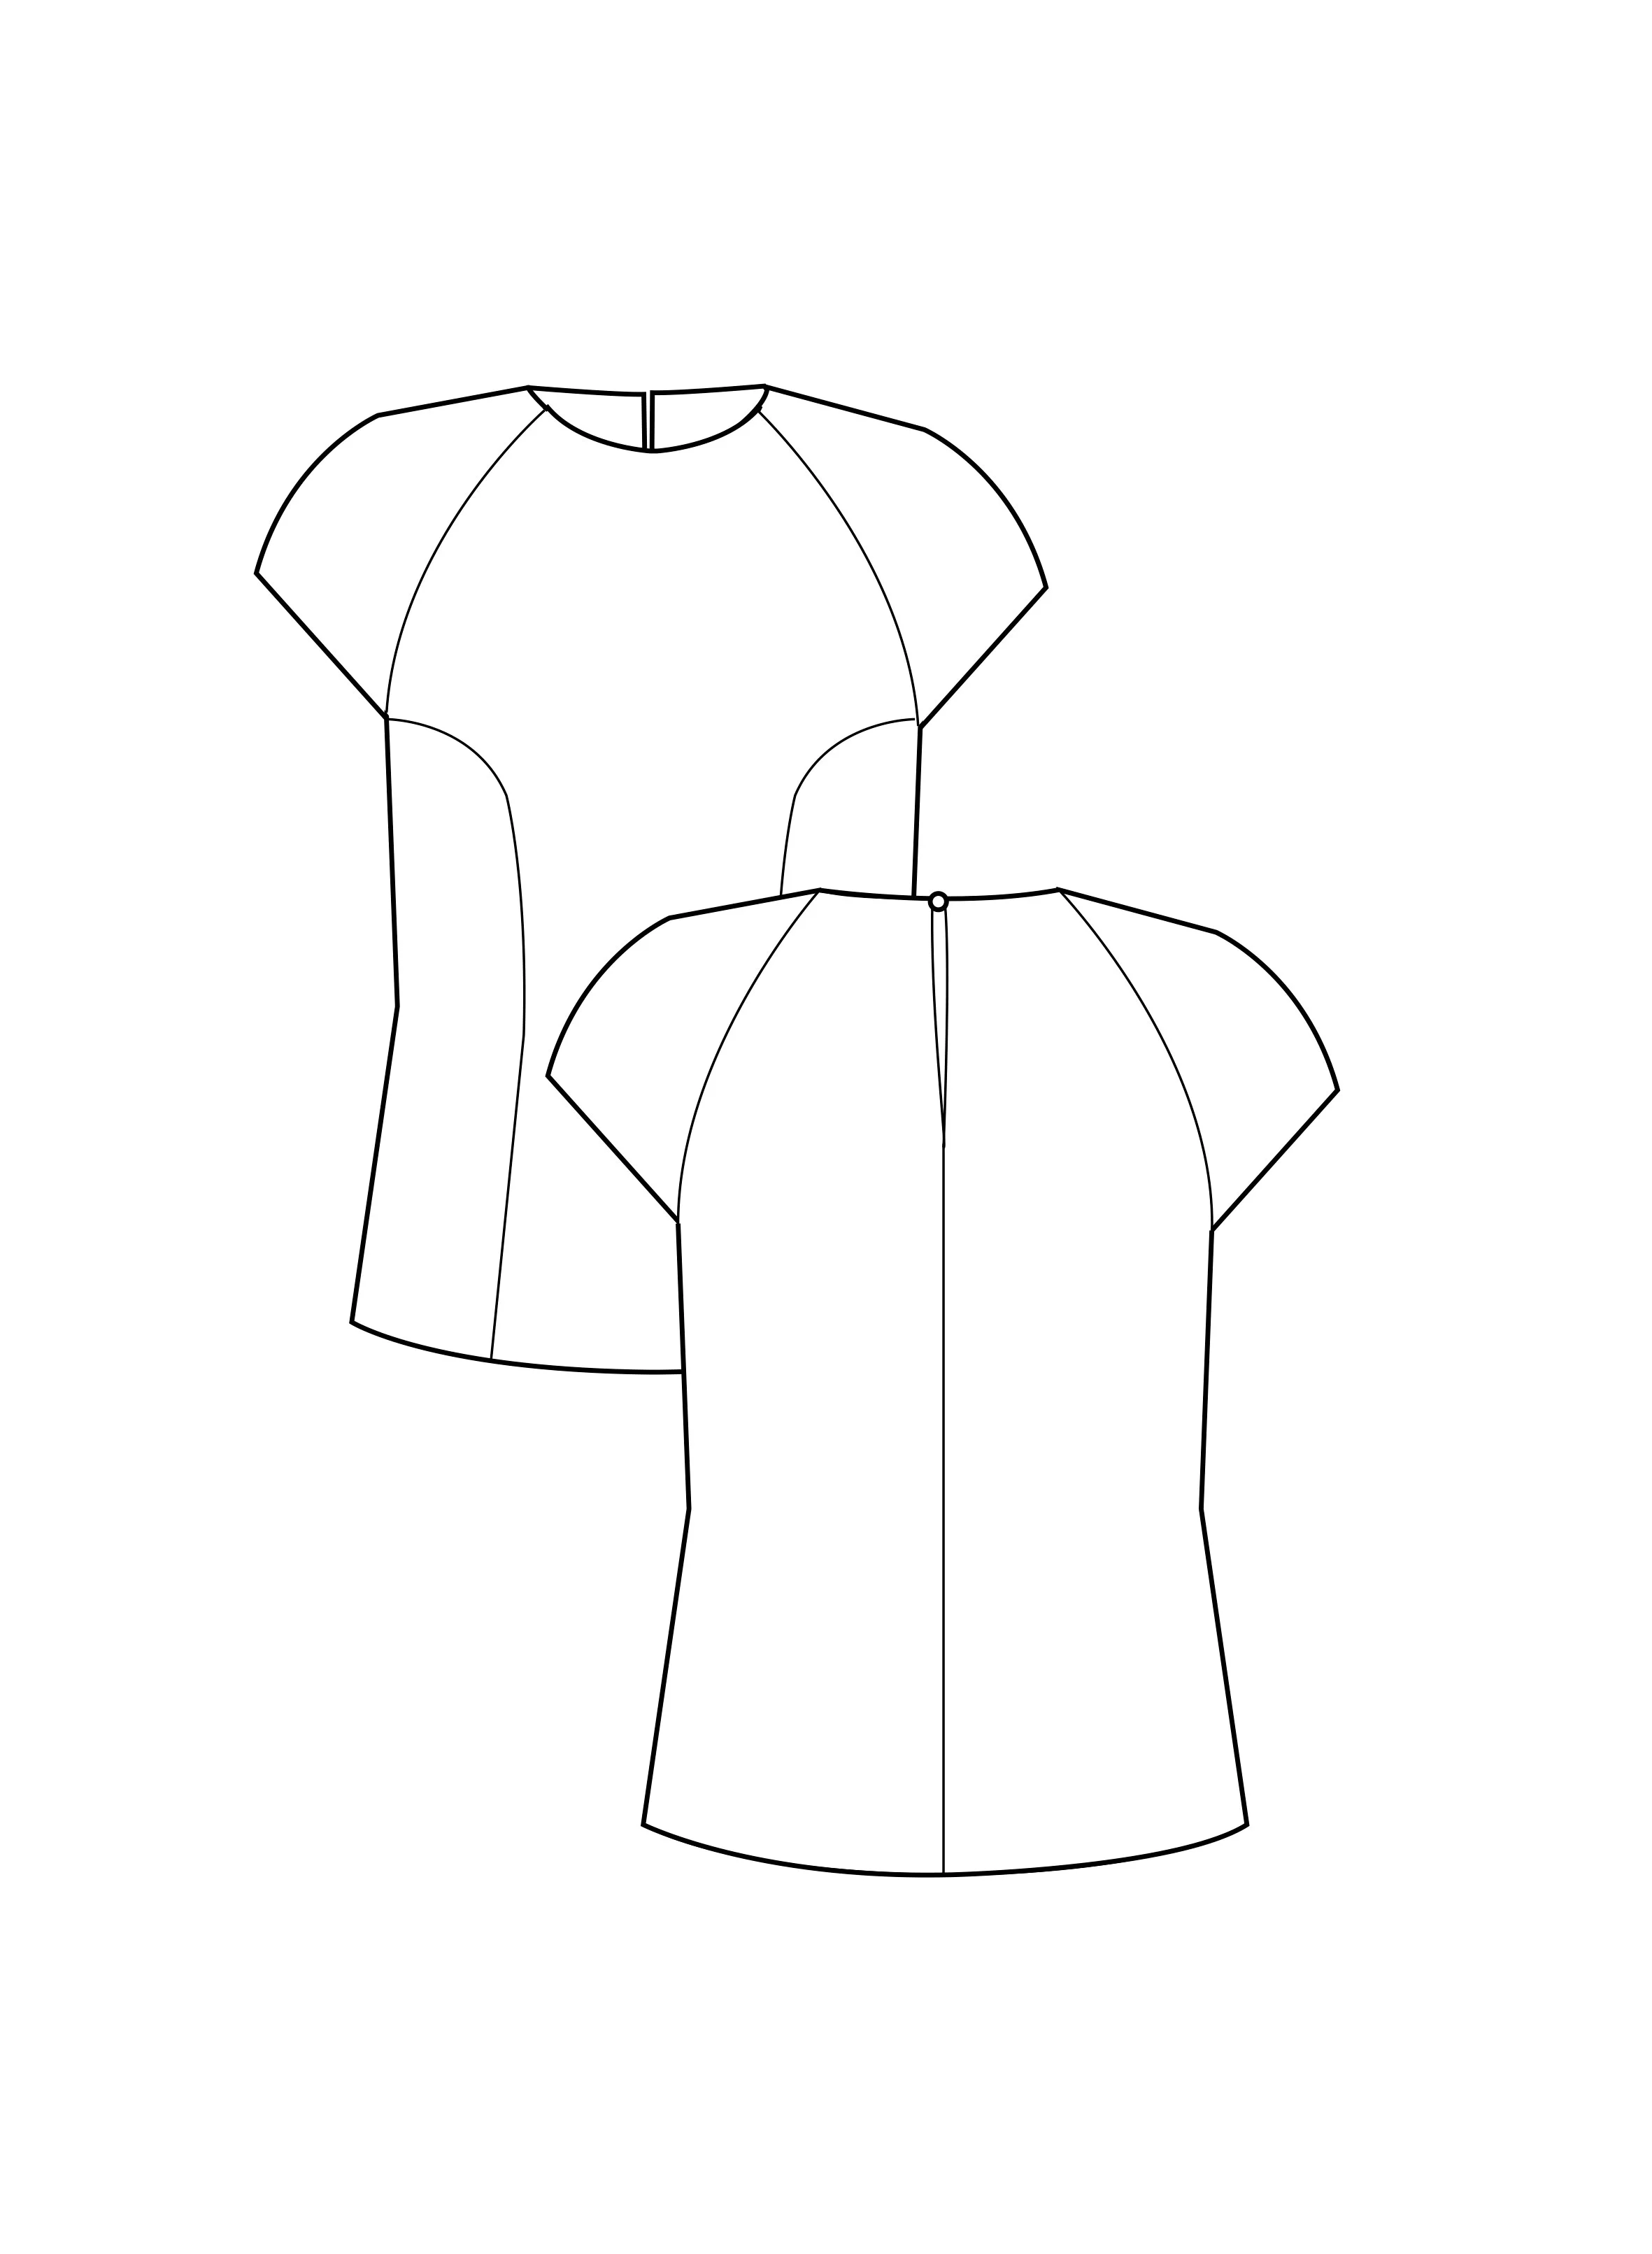
No. 3 Kastrup - Version 1
A classic blouse with a princess cut, raglan sleeve, round neckline. This is a perfect basic blouse with a lightly fitted shape.
Fabric choice:
Light to medium weight woven fabric. Cotton, Silk, Wool, Viscose, Cupro, Linen or Polyester The final look of the garment will depend on the type of fabric you choose. Not suitable for jersey.
Find Your Size:
Take your measurement according to the measurement chart. Choose the size closest to your measurement see print measurement chart here

Fitting:
We recommend that you always make a muslin before you cut the fashion fabric, to make sure your finished style will fit you perfectly. Find the fitting guide right here.
NOTE!
if you have purchased the pattern before November 2021
We have mae the sewing instruction beyyer and therefor we haev decieded to remove pattern piece (B) under arm facing and then finiche the under arm with a bias tape instead.
Cutting Fabric
On each pattern piece, you will find a capital letter. On the cutting layout plan, you will find the same capital letters so that you can easily see which pattern pieces to use for the view you have chosen.
For this style you will need pattern piece A C D E F G L
Sewing
NB! The Pattern Has 1 Cm Seam Allowances Included, Unless Otherwise Noted.
1. Cut all your pieces in fabric and interfacing
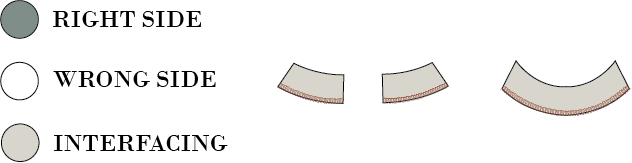
2. Press the interfacing to the pattern piece F & G.
3. Overlock to finish the long edges on your facings (F and G)
Sew blouse
4. Sew front-side pieces together with center front pieces, right sides together. Pin the pieces according to the notches indicated on the pattern.
5. Overlocker to finish the seams. Press the seam allowance towards the front.
6. Overlock side seams and center back seam, separately.
7. Sew center back seam, right sides together, up to the notch. Press the seam open.
8. Sew front neck facing and front piece together in the neckline, with right sides together.
9. Sew back neck facing and back piece together in the neckline, with right sides together

10. Understitch the facings and clip notches to the seam allowances*
11. Flip the neck facing onto the right side of the back piece and sew it together at the center back with 1 cm.
12. Sew the slit opening at the center back. Fold 0,5 cm x 0,5 cm and stitch.
13. turn and press the back nicely.

Sew THE sleeves
13. Sew the back and front sleeves together in the shoulder seam, right sides together. Now you have 4 pieces in total.
14. Paired the sleeves two by two, right sides together. Sew in the bottom line. Understitch on one side, be sure to make one for the right side and one for the left side.

15. Sew the sleeves together at the neckline, right sides together.
16. Understitch the and clip notches to the seam allowances

NOTE! Now You Have Two Doubled Layered Sleeves.
17. Sew the front sleeves, by placing the sleeve at the neckline with right sides together. Fold the facing over the sleeve and sew. Cut corners. See guide
18. Turn the sleeve and neck facing. press

19. Repeat this on the back sleeve.
20. Sew the side seam, right sides together. Press the seam open.
21. Place the bias tape to the armscye, right sides together, from the front neckline and all the way to the back neckline. sew with 0.7 cm fold the bias tape around the raw edge and finish with a topstitch. See a guide here.

22. Overlock the bottom and hem with a catch stitch or a narrow hem
23. Sew in a small button for closing, and make a hand-knitted loop.